现在我将Camera Raw在人像调色上的技巧和大家做作初步的探讨。
大家看下原图与效果图对比:
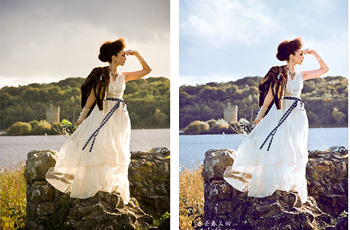
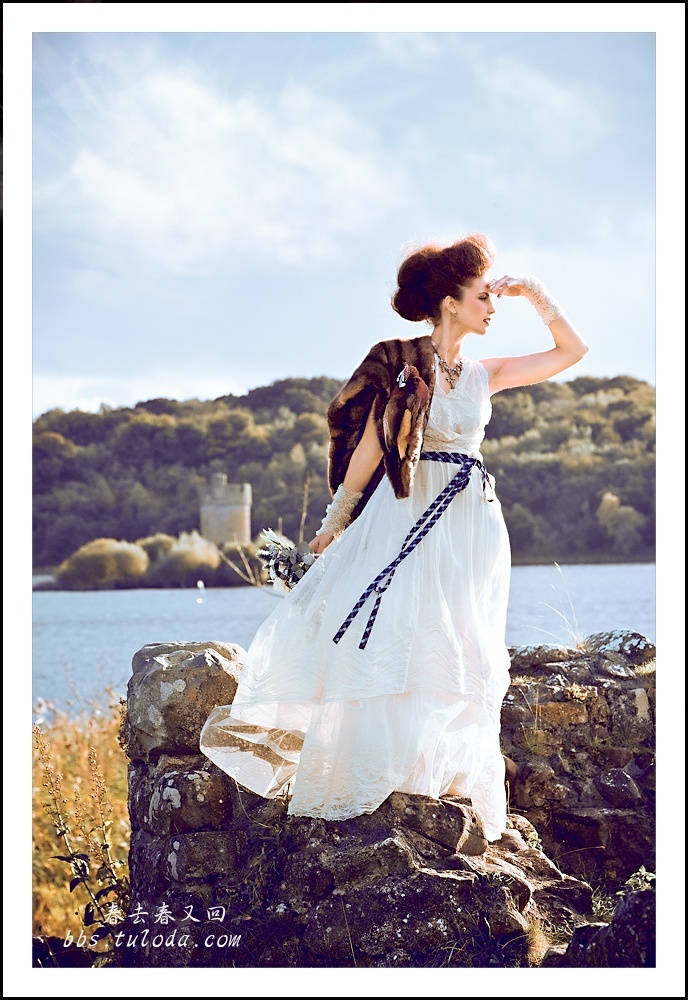
效果图:
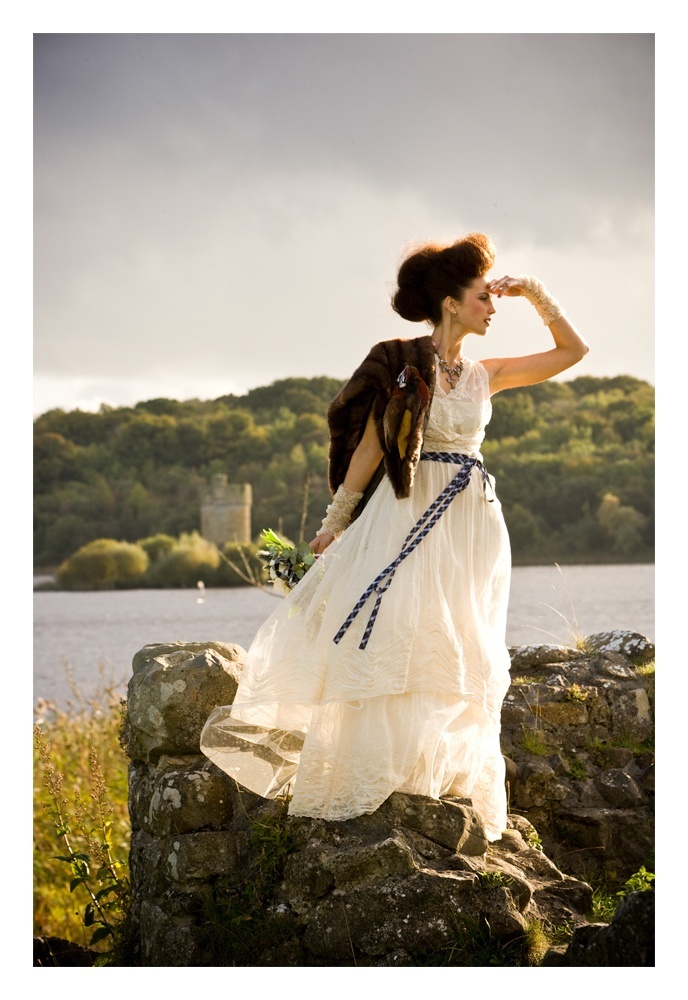
原图:
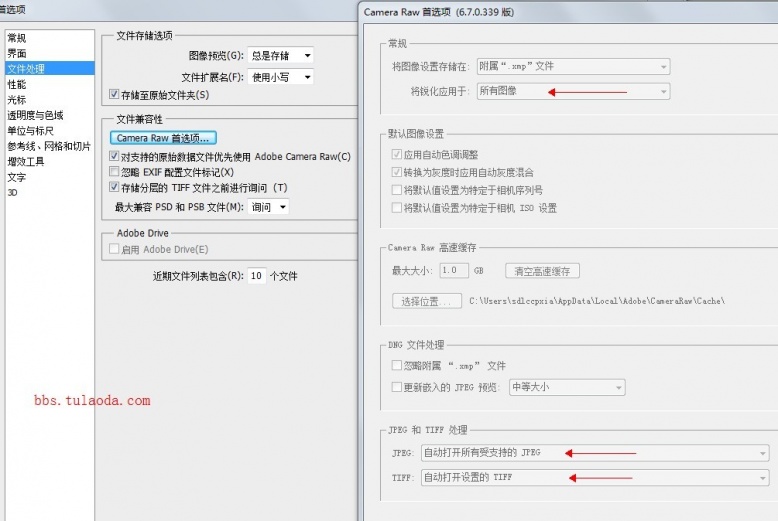
1, 打开PHOTOSHOP找编辑→首选项→文件处理→Camera Raw首选项→在默认设置前两项上打勾→在JPEG和TIFF处理→把禁止JPEG文件、
禁止TIFF文件→改成自动打开所有受支持的JPEG和自动打开所有受支持的TIFF。这样Camera Raw就能打开所有照片的格式
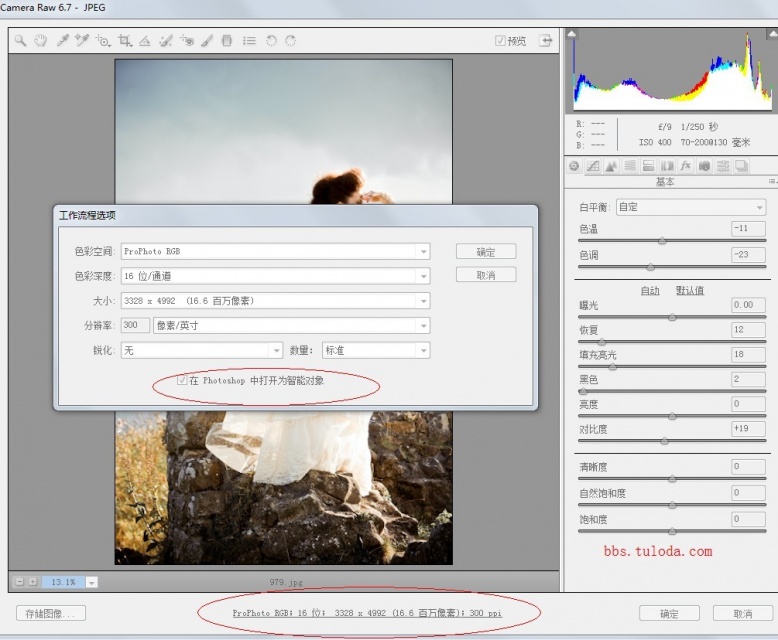
打开一张图,进入RAW操作页面点下图红圈处,出现工作流程选项,再PHOTOSHOP中打开为智能对象前打勾。
这样做的好处,是为以后返回RAW处理照片时提供方便。
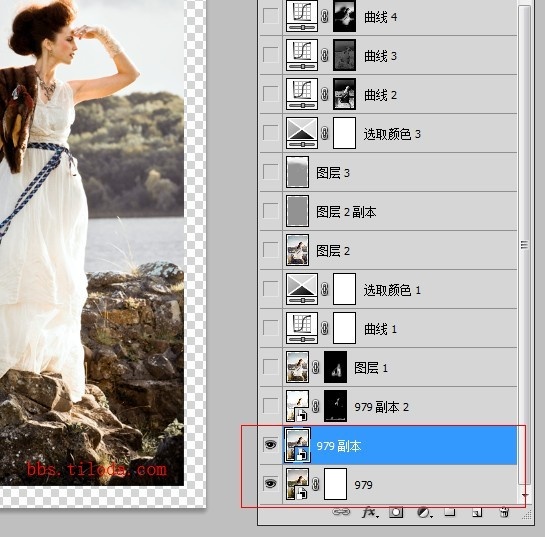
二, 现在我们打开片子进入PS。在原始图层上点击通过拷贝新建智对象。这样就得到了一个与原原始图层相同的新图层,
我们在这图层上对片子进行后期处理,而不影响原片的数据.
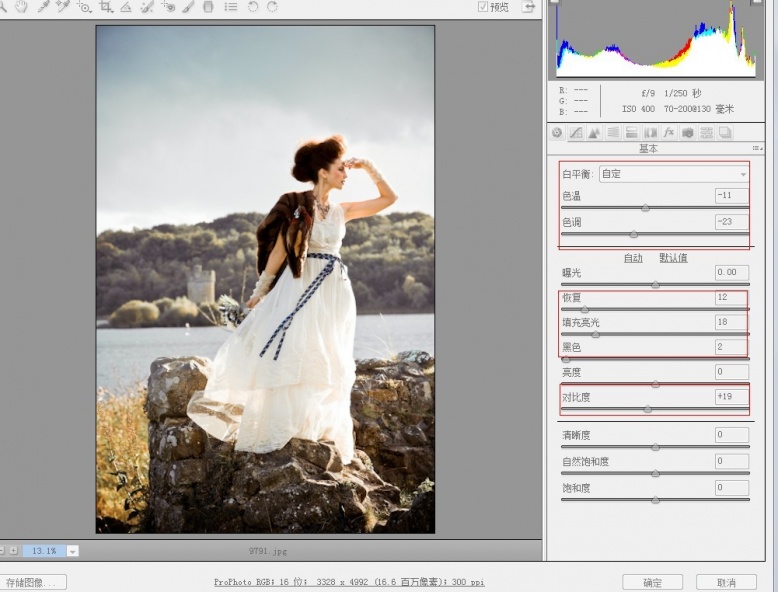
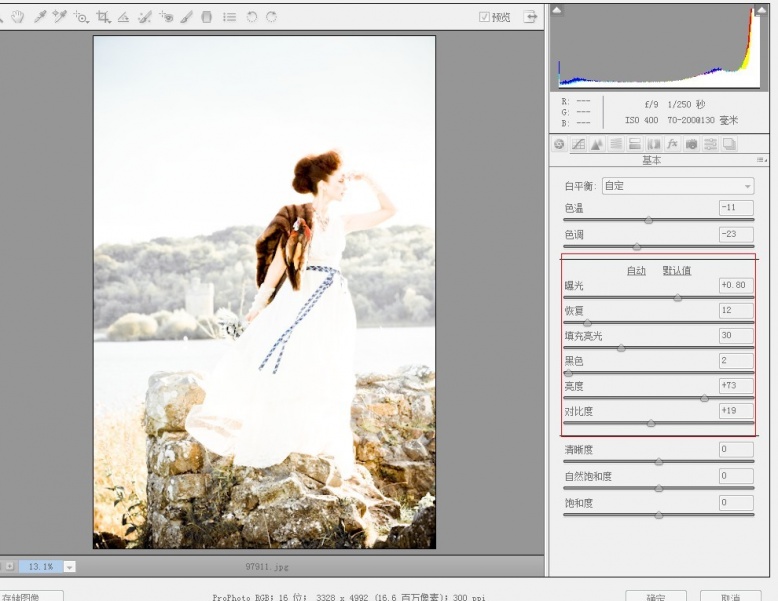
三,点击副本层的图标回到RAW对片子进行色调的细致调整(我个人的观点是在RAW里一定要调出相要的效果的初步色调,
这样在PS里调整时,就会省好多力气)调整具体参数如下面的截图:
先分析下原片,原片暴光基本正常,所以我们对这些基本的参数不用作很大的调整。但是人物有肤色不透不亮,,天空也是偏灰,
我们就对这些作精细的调整。
1,在基本的操作项里白平衡选择自定就可以了。,其他的简单调下对比,数值如下图。
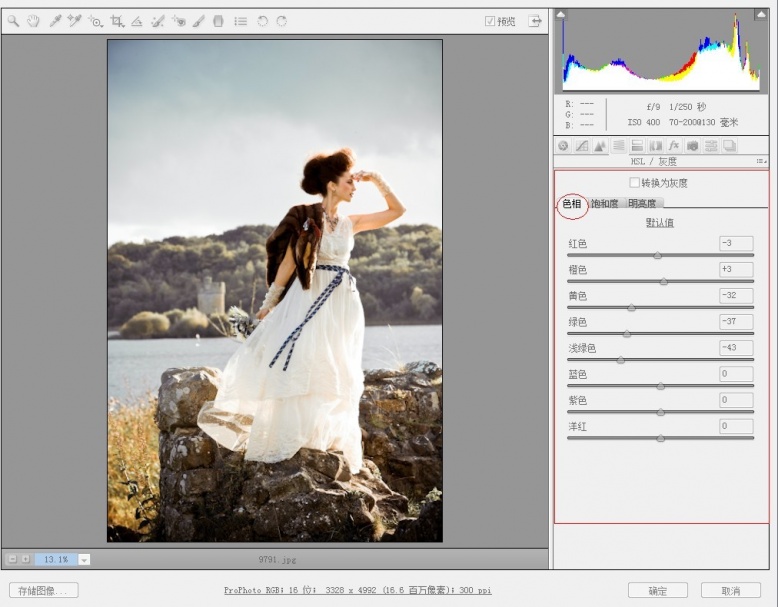
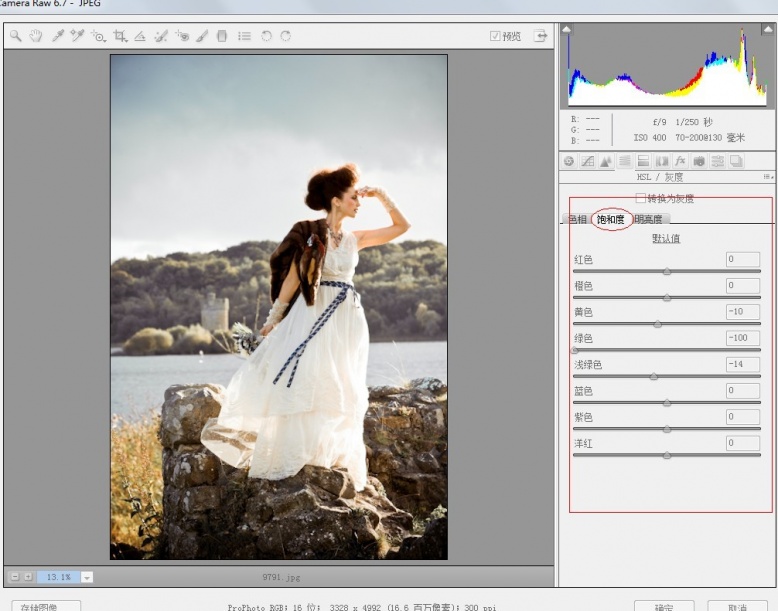
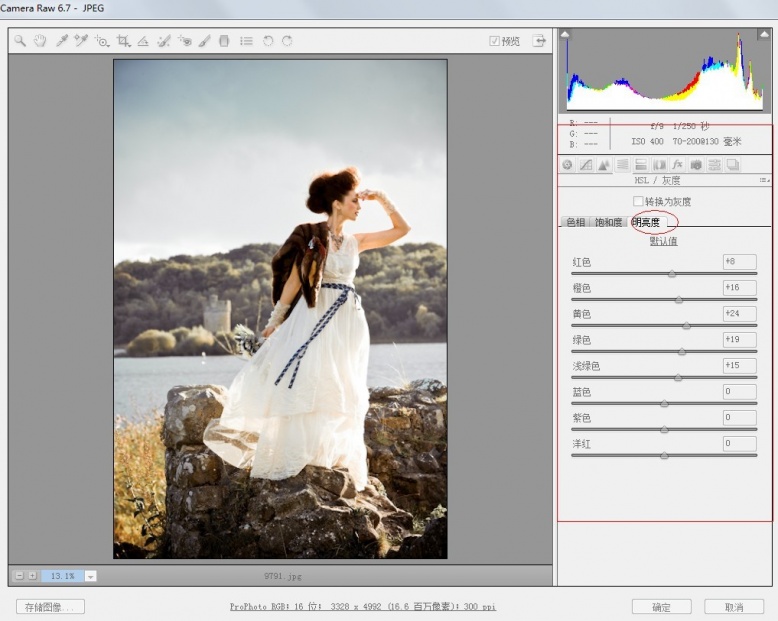
2 ,下边的这一步是对肤色环境色作一个调整,特别是肤色的调整,(这儿我给大家提示一下,在这调整过程里,橙色的调整是对皮肤最有用的。特别重要)
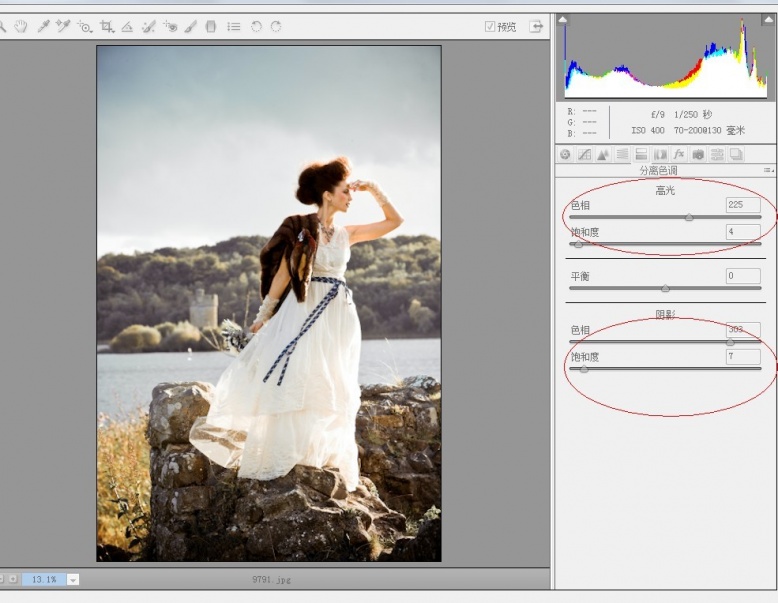
3,分离色调调整,目的是让色调自然、统一。
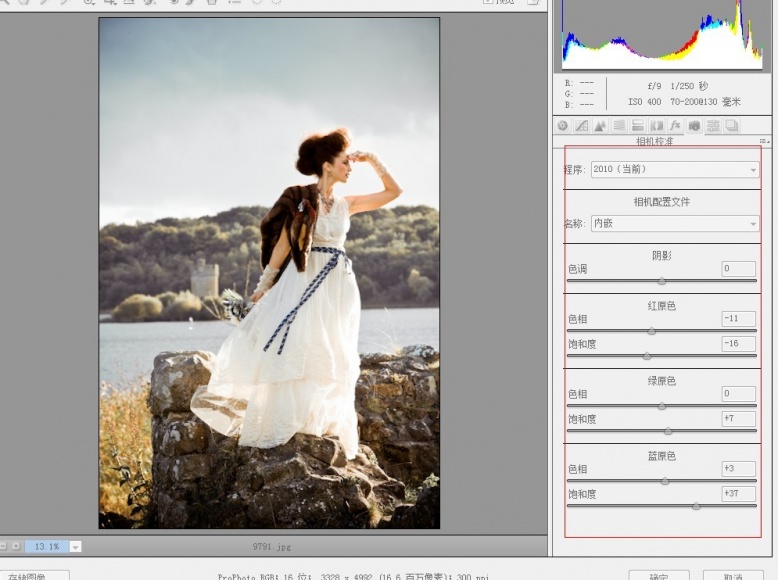
4,对相机较准下午调整,这个类似于PS里的通道混合器,主要是对整体颜色现在做一个精细的调整。
5,做完了这些,我们回到PS,发现片子的暗部太暗,比如头发、皮草、石头细节少了许多,这样我们再拷贝一智能对象图层,
然后再回到RAW,对暴光作下调整,目的是调整暗部的细节,数值如下图:
6,回到PS在这一图层上添加黑色蒙板,用适当不透明度的白色画笔在头发、皮草、石头细节少我地方画出细节。
到此,本图在RAW里的调整就完成了。
四,接下来我们就回到PS对片子作色彩色调的进一步调整。
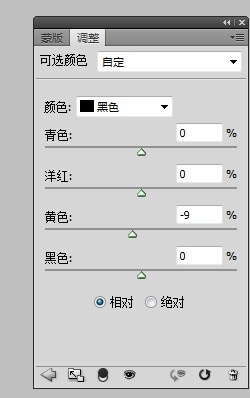
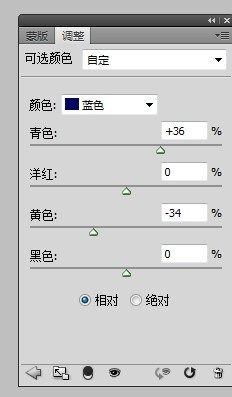
1,我感觉这个片子的意境应该加点凝重的效果,所以接下来,我先大致用可选颜色调了下。增加了暗部的蓝色。
数值如下:
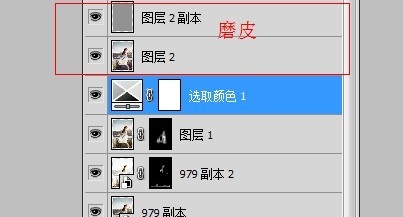
2,然后就是磨皮了,大家可以选用自己习惯的方法。
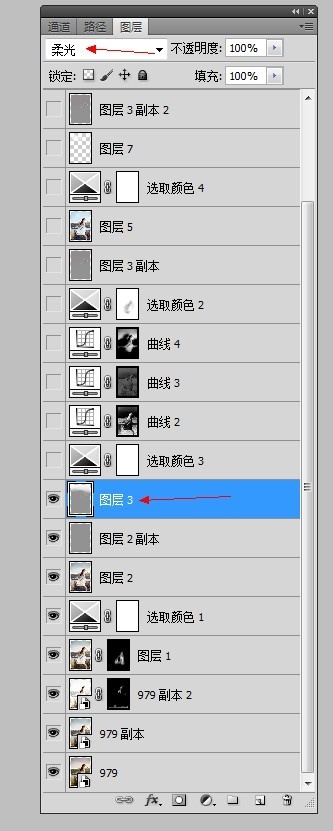
3,新建一中性灰图层,模式为柔光。用白色画笔画出天空阴暗的部分。为下一步处理天空色调作准备。
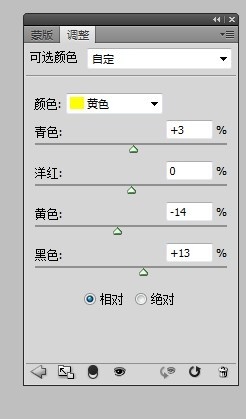
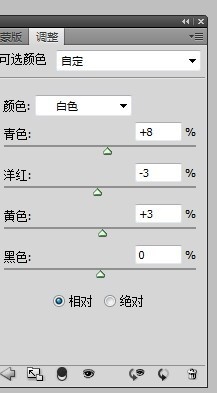
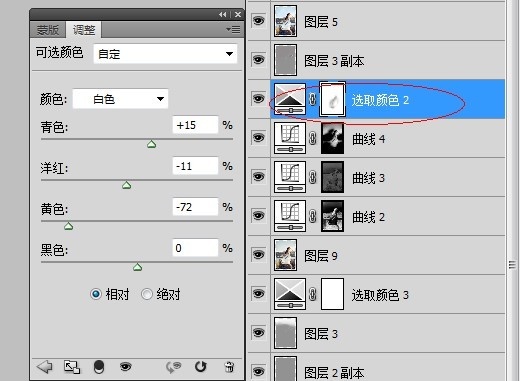
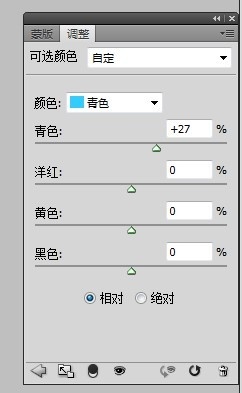
4,再用可选颜色调整肤色与天空。数值如图:

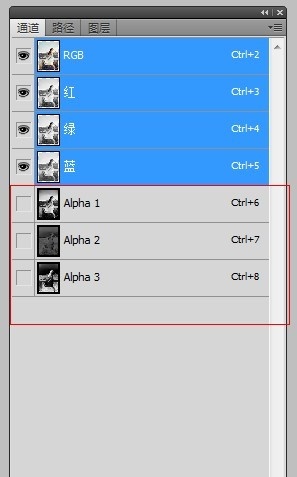
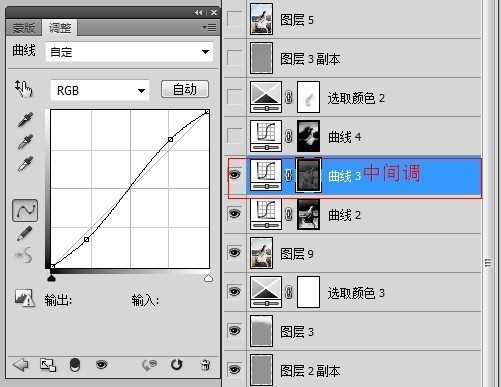
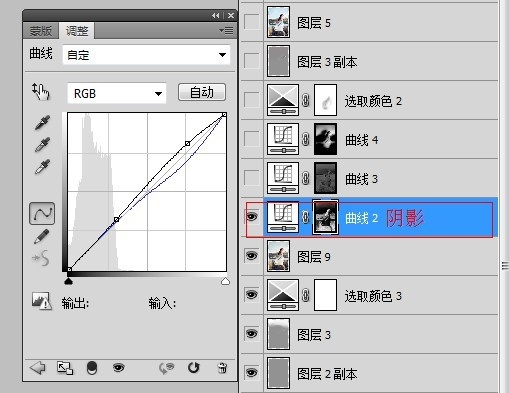
5,盖印图层后计算出高光、阴影、中间调选区,然后对各选区作分别调整:

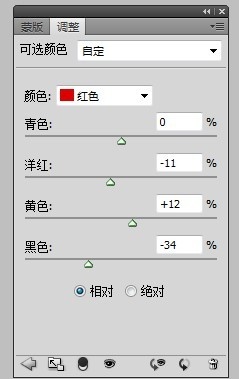
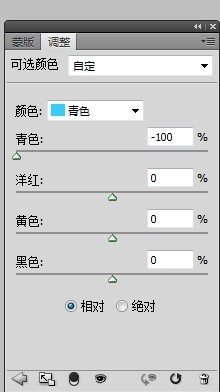
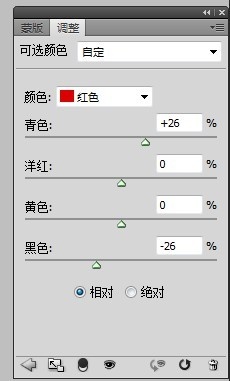
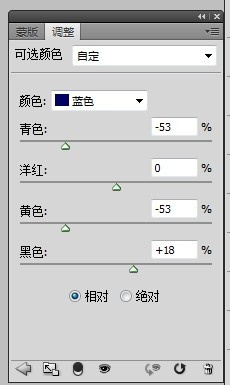
6,再用可选颜色调整天空与湖水的颜色:调好后添加蒙板,用合适的不透明度画笔擦出衣服。
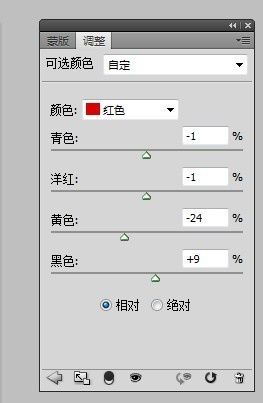
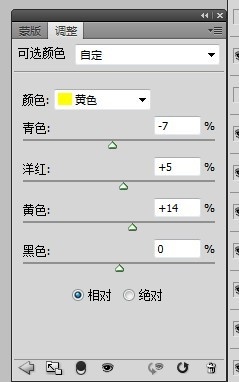
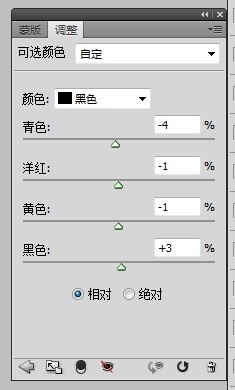
7,再新建可选颜色图层,对环境色作细微调整:
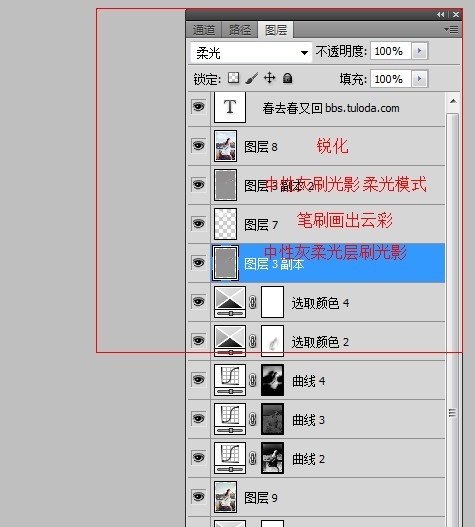
8,最后就是用中性灰柔光图层刷出人物光影,添加云彩,锐化就在大功告成了。
最终效果图!