周日是玩Photoshop和尝试新想法的日子。像往常一样,我浏览了一些书籍和网站,寻找一些灵感。我还沉迷于手书的艺术印刷,它是一本必须有书籍的一些旧风格的印刷参考。我有一些想法,还发现了Alex Beltechi在Dribbble上的一个令人惊叹的图片,叫做《风中缠绕》。然后我又开始了我想知道如何在Photoshop中创建的效果。在本教程中,我将向您展示如何使用Photohosp和Repousse工具创建超级酷和非常简单的效果。整个过程很简单,不到10步,不超过30分钟。打开Photoshop,创建一个新文档。我使用的是2560
x1680和300 DPI(非常重要)的黑色背景。使用水平类型工具(T)添加文本。我正在使用Edwardian脚本ITC。请注意,我将“the”与“book”和“Abduzeedo”联系起来。在将文本合并到一个新层之后,通过单击层持有命令(MAC)/Co
ntrol(PC)的缩略图,创建文本区域的选取框。步骤2到3D> Repousse>当前选择。打开后的对话框将打开,然后将深度改为.7,并将灯光设置为白昼灯。此外,您还可能需要选择一些区域来将类型更改为针对内部约束的漏洞。这是3D过滤器之后的结果。为了渲染最终的图像,您必须选择3D拨号盒中的场景,并将质量更改为Ray跟踪的final。步骤4将所有图层合并成一个包含黑色背景的图层,然后点击Image>将输入级别更改为65、1.35和128。第五步去Image>Mode>灰度。然后去Image>Mode>位图。将输出更改为600像素/英寸,并将方法改为半色调屏幕。在半色调的屏幕上,将频率改为70行/英寸,角度为45度,形状为直线。步骤7去Image>Adjustments>水平。将输入更改为17、1和206。还将输出级别更改为42和255。第8步添加一些纹理。导入一些旧的纸张纹理,我使用的是Shutterstock提供的,你可以在http://www.shutterstock.com/pic-43075990/stockphoto -the-old-shabby- pap…然后到Image>调整;Leveles。将输入更改为142、1.00和255。结论改变纹理图层,效果基本完成。你也可以将图像保存在步骤5中,然后在图层的顶部再添加50%的透明度,使效果更平滑一些。正如你所看到的,位图模式完美地创造了一些老式的印刷效果,尤其是现在,当vintage和这种效果非常流行的时候。单击图像以获得完整预览。下载Photoshop TutorialClick来下载这个教程的Photoshop文件。


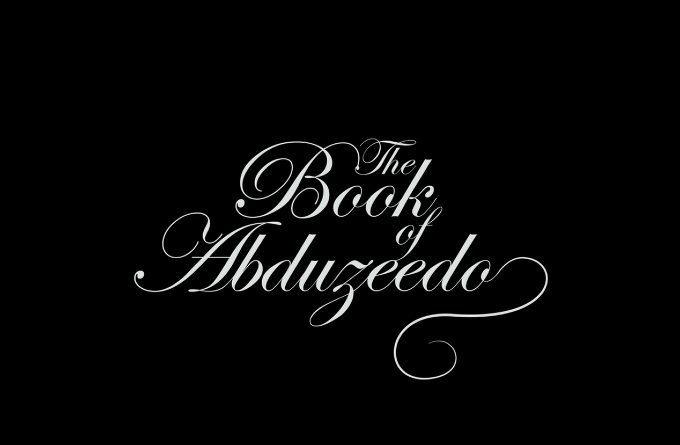
Sunday is the day to play with Photoshop and try some new ideas. As usual I went through some books and Web sites to find some inspiration. I am still addicted to the Handy Book of Artistic Printing, it's a must have book for some old style print references. I got some ideas and also found this amazing image from Alex Beltechi on Dribbble called Twisting in the Wind. Then I new the effect I wanted to know how to create in Photoshop.So in this tutorial I will show you how to create a super cool and very easy effect using Photohosp and the Repoussé tool. The whole process is quite simple, it's less than 10 steps and won't take you more than 30 minutes.Step 1Open Photoshop and create a new docu
ment. I am using 2560
x1680 with 300 DPI (very im
portant) with black background. With the Horizo
ntal Type Tool (T) add a text. I am using for the font Edwardian s
cript ITC. Notice that I sort of co
nnect the words "the" with "book" with "of" and with "Abduzeedo". After that merge the texts into a new layer then create a marquee selec
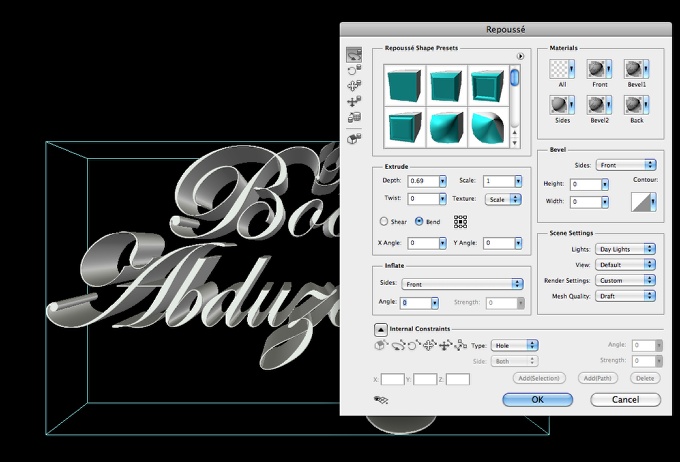
tion of the text area by clicking on the thumbnail of the layer holding Command(MAC)/Co
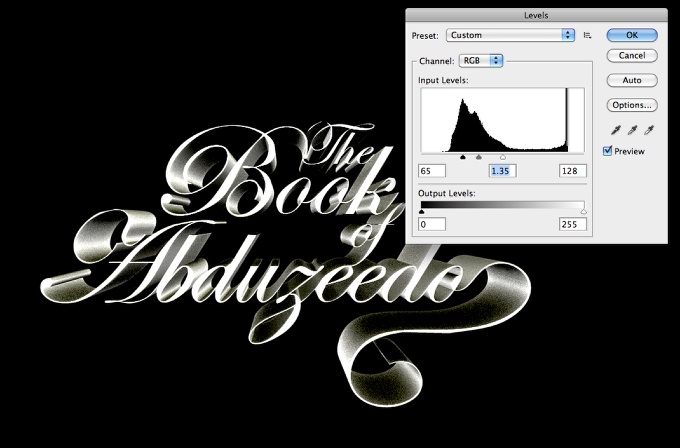
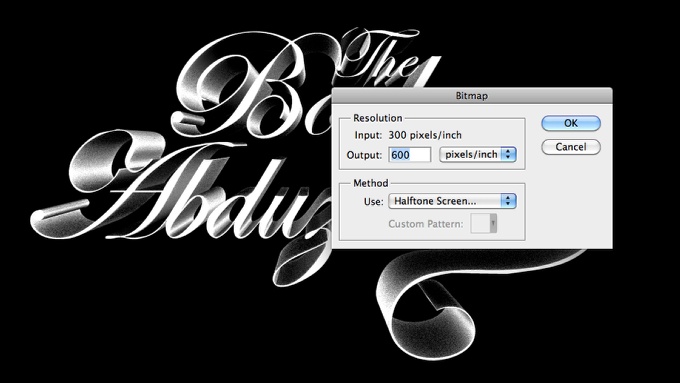
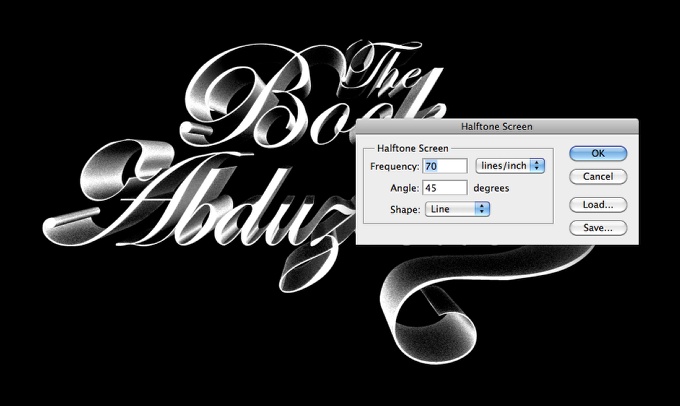
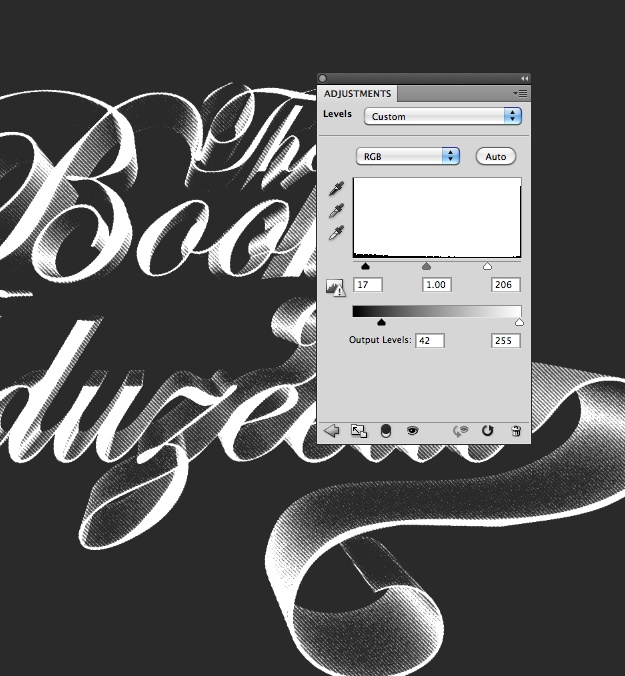
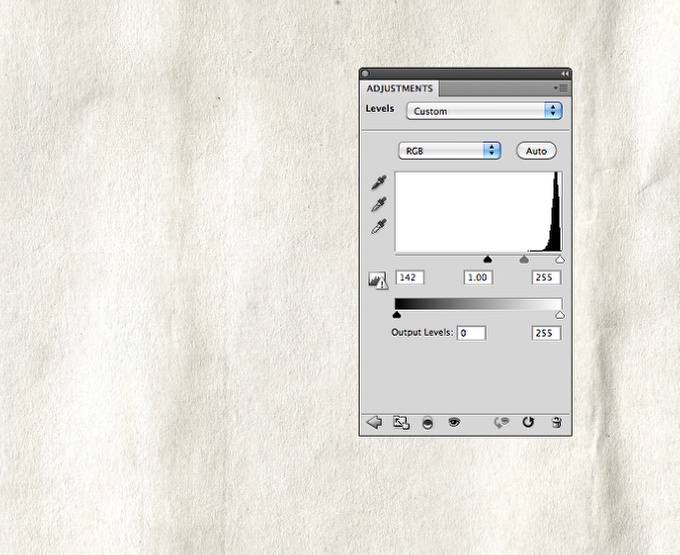
ntrol(PC).Step 2Go to 3D>Repoussé>Current Selection. The Repoussé dialog box will open then change the Depth to .7 and the Lights to Day Lights. Also you might have to select some areas to change the type to Hole for the Internal Constraints.Step 3This is the result after the 3D filter. In order to render the final image you must select the Scene in the 3D dialag box and change the Quality to Ray Traced Final.Step 4Merge all layers into one including the black background, then go to Image>Adjustments>Levels. Change the Input Levels to 65, 1.35 and 128.Step 5Go to Image>Mode>Greyscale. After that go to Image>Mode>Bitmap. Change the Output to 600 pixels/inch and the Method to Halftone Screen.Step 6For the Halftone Screen, change the Frequency to 70 lines/inch, the Angle to 45 degrees and the Shape to Line.Step 7Go to Image>Adjustments>Levels. Change the Inputs to 17, 1 and 206. Also change the Output Levels to 42 and 255.Step 8Time to add some texture. im
port some old paper texture, the one I am using is courtesy from Shutterstock and you can find it at http://www.shutterstock.com/pic-43075990/stock-photo-the-old-shabby-pap…. After that go to Image>Adjustments>Leveles. Change the Input to 142, 1.00 and 255.Co
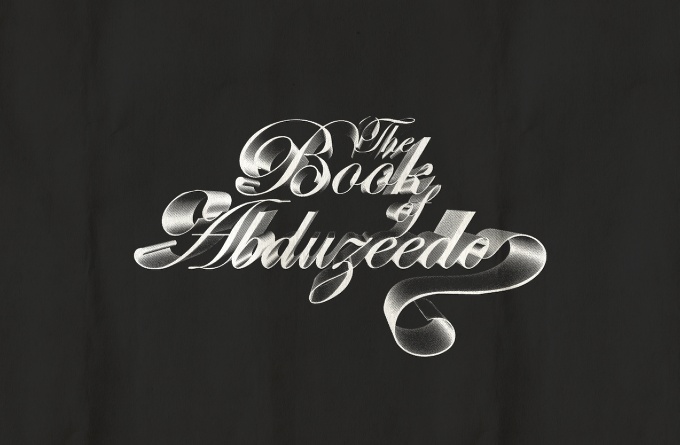
nclusionChange the texture layer to Multiply and the effect is pretty much done. You can also save the image in the step 5 and reuse it here adding on top of the layer with halftone at 50% Opacity to make the effect a bit more smooth. As you can see the Bitmap mode is perfect to create some old style print effect, especially now that when vintage and this sort of effect is quite trendy.Click on the image for full preview.Download the Photoshop TutorialClick here to download the Photoshop file used for this Tutorial repousse vintage 3d photoshop tutorial
