这篇教程是向PSD素材网(www.PSD.cn)的朋友介绍利用Photoshop打造人物头像风格化照片效果,这是一个简单风格化照片的例子,基本只要几道程序就可以把效果做出来,大家一起来练习练习这个简单的人物头像PS教程吧。
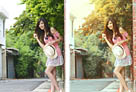
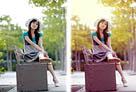
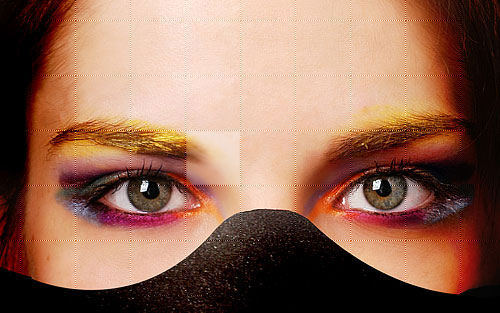
老规矩,先看效果图:
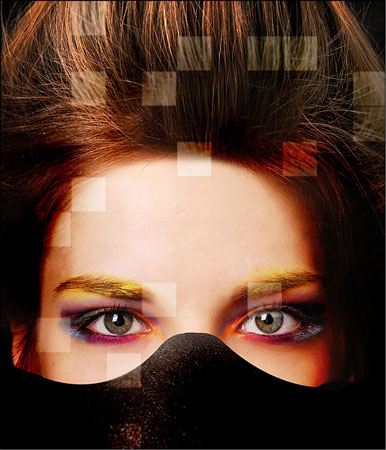
素材下载
第1步
在Photoshop中打开照片。 并调整其大小为600 × 750像素。
第2步
创建一个55 × 55像素大小的新文件,并用铅笔画工具(大小:1像素)的黑与白点如图片所示。
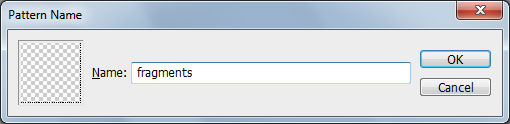
第3步
然后进入“编辑>定义图案,并保存为模式的。 之后,您可以关闭而不保存此文件。 返回到主文档,创建新层,填充油漆桶工具,使用我们创建的图案的。
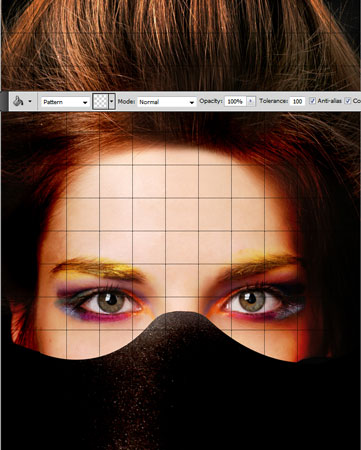
第4步
选择网格层,设置透明度为80%。

第5步
然后我们回到人物头像图层,选择矩形选择工具,按住Shift键画出一个正比例正方形。
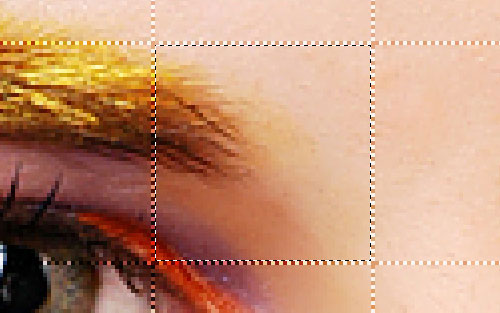
第6步
使用减淡工具,笔刷大小:100,范围为:中间调,曝光为:30%。

第7步
然后选择模糊工具,大小为:50%,或者直接适用高斯模糊,大小为:3-4。
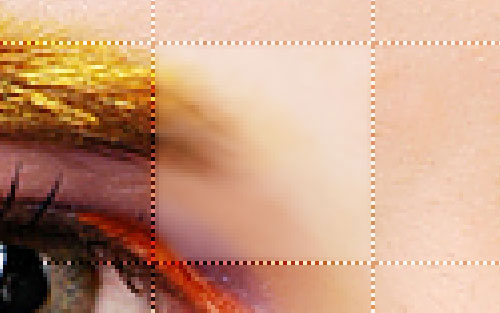
第8步
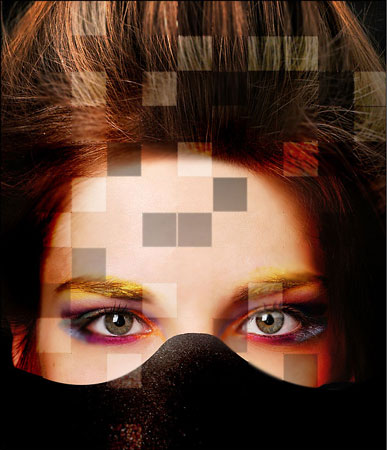
按CTRL + D取消选取后就是下面的效果
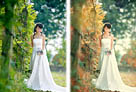
第9步
以同样的方式添加更多效果。
第10步
之后我们增加一些暗调,步骤跟前面的一样,但是到第六步我们就使用加深工具,笔刷大小:100px,范围:中间调,曝光:40%,就做出下面的效果了。

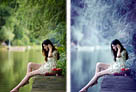
第11步
这里我们在添加一些模糊的地方,具体的就不做了,看下下图的效果就知道了。
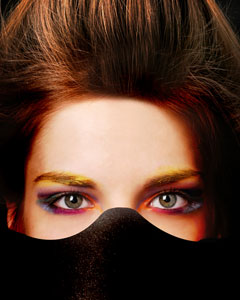
教程结束,以上就是用Photoshop打造人物头像风格化照片效果过程,希望大家喜欢本教程!~