
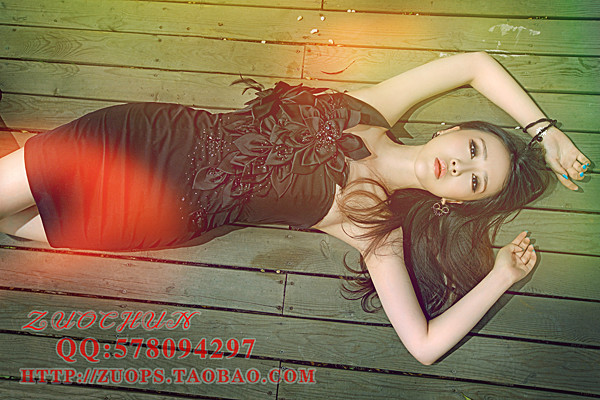
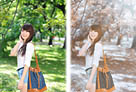
效果图:
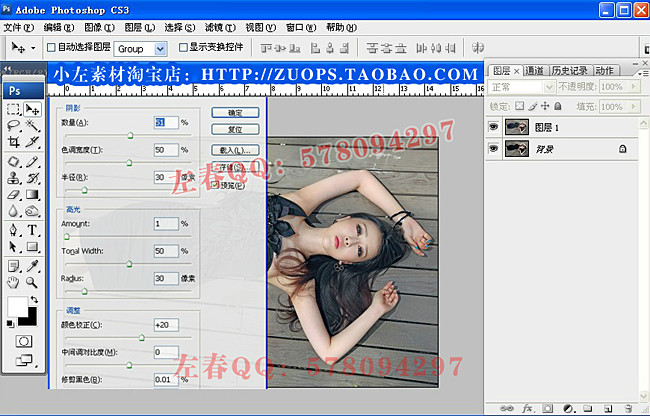
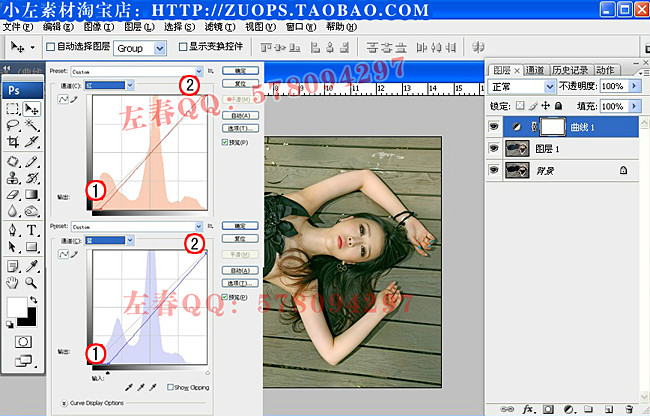
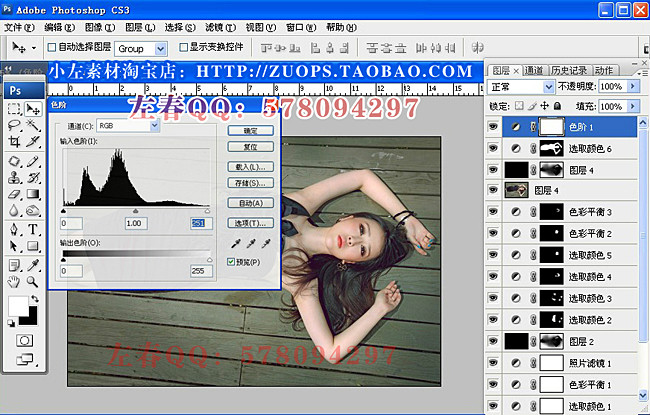
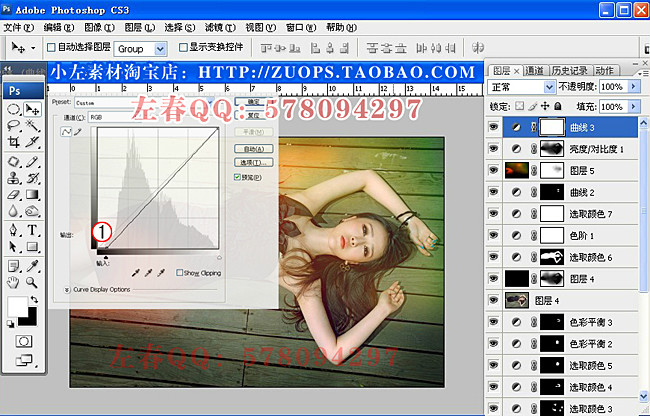
2点(输出255,输入245)
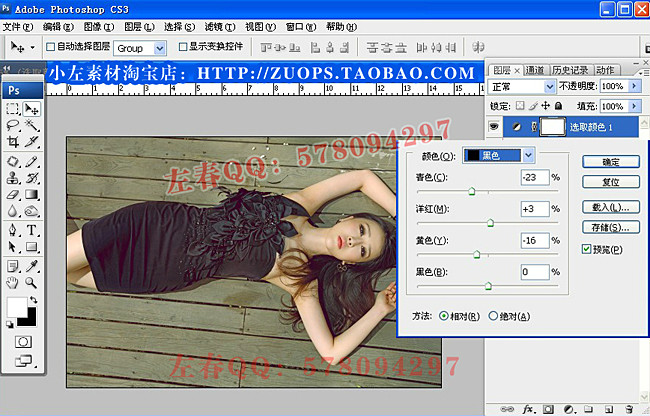
通道-蓝 1点(输出0,输入34)
2点(输出248,输入255)
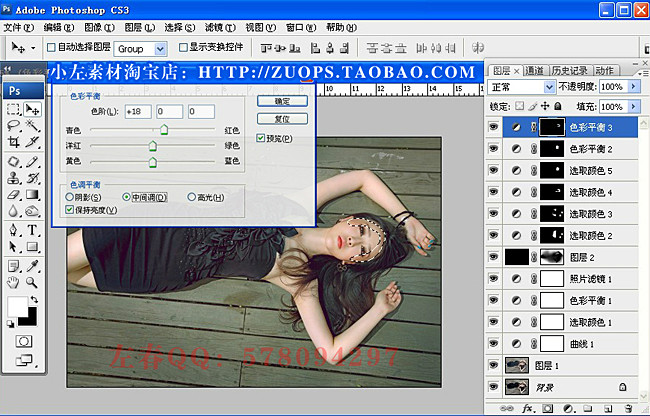
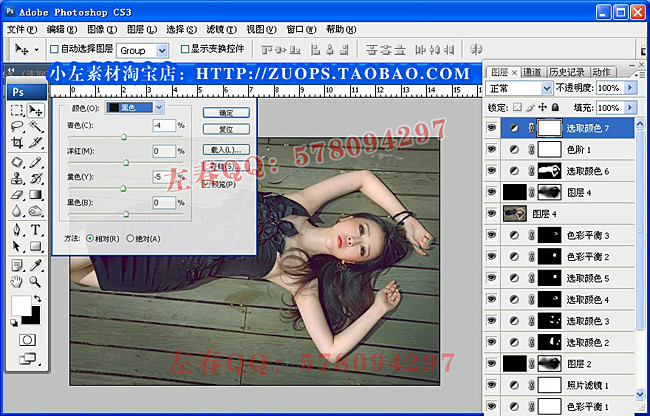
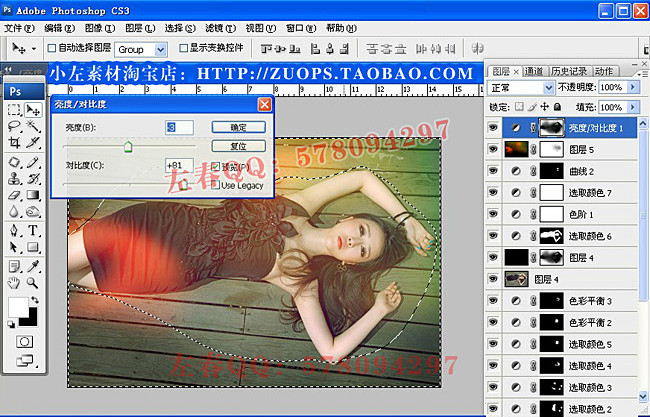
中间调(红-3 绿0 蓝0)
高光(红+2 绿0 蓝+3)
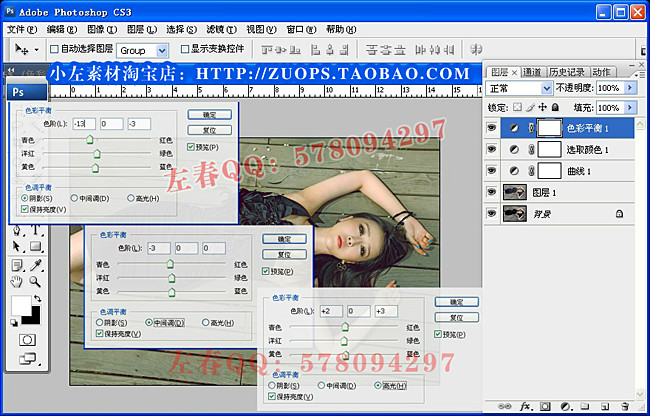
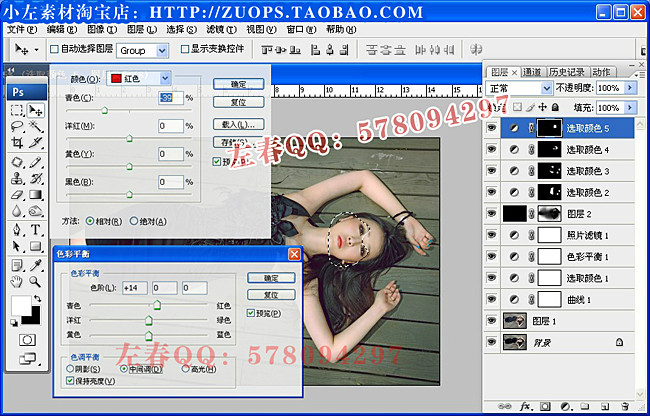
色彩平衡/中间调(红色+14 绿色0 蓝色0 )
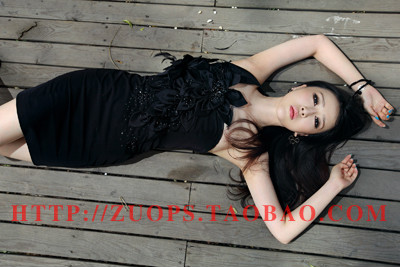
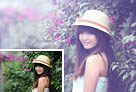
效果图:
 PS为美女图片调出柔美影楼色(橙褐色)
 photoshop利用通道替换打造唯美的青蓝色草地美女图片
 Photoshop为停车场的美女调制小清新的青蓝色
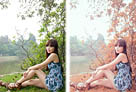
 Photoshop为公园中的美女调制出怀旧的褐绿色
 Photoshop为趴在草地的美女加上纯美的淡调蓝紫色
 Photoshop利用Lab模式为野花中的美女加上甜美的粉色调
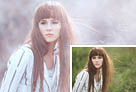
 PS为美女人像图片添加小元素制作成创意梦幻效果
 Photoshop为树林小路上的美女调制出唯美的秋季淡暖色
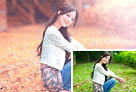
 Photoshop为河边的美女加上漂亮的秋季粉红色
 Photoshop为田园美女调制出唯美的梦幻淡调蓝红色
 Photoshop将绿草上的美女打造出甜美的韩系淡绿色
 Photoshop为树木边的美女增加柔美的深秋酒红色
 Photoshop为公园中的美女调制出小清新暖褐色
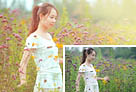
 Photoshop为草地美女调出唯美的暖黄色
 Photoshop把美女照片变成机器人效果
 Photoshop给公园中的美女加上小清新暖褐色
 Photoshop为花边的美女加上唯美的中性淡青色
 Photoshop为外景美女调出柔美暖色调
 Photoshop将美女变成邪恶之神
 Photoshop快速为美女打造洁白如玉的完美肌肤
 Photoshop将美女人像打造出手绘效果